שלום לכולם ,
היום נדבר על Azure Privilege Identity Management או בשמו הקצר Azure PIM .
PIM מאפשר לנו להקצות תפקידי ניהול לזמן מוגבל , לרוב יהיה שימושי עבור אנשי HD שצריכים לבצע שינוי שקשור בניהול Exchange , Intune וכו’ .
עובד בתצורת Just-In-Time (JIT) עבור אפליקציות Office365 + Azure AD וגם על אפליקציות SaaS .
הממשק מאפשר למשתמש ליצור בקשה ולאשר תהליך טכני במגבלת זמן מסוימת , לדוגמה : הרשאות כניסה לפורטל Microsoft Endpoint Management (Intune) והקצאת תחנת עבודה עבור משתמש .
PIM מספק את הדברים הבאים :
- Provide just-in-time privileged access to Azure AD and Azure resources
- Assign time-bound access to resources using start and end dates
- Require approval to activate privileged roles
- Enforce multi-factor authentication to activate any role
- Use justification to understand why users activate
- Get notifications when privileged roles are activated
- Conduct access reviews to ensure users still need roles
- Download audit history for internal or external audit
ניתן להקצות תפקידים מסוימים מתוך Office365\Azure AD Portal עבור משתמשים והפעלת אותו תפקיד לפרק זמן מסוים .
הגישות מתחלקות למס’ סוגים :
| Term or concept | Role assignment category | Description |
| eligible | Type | A role assignment that requires a user to perform one or more actions to use the role. If a user has been made eligible for a role, that means they can activate the role when they need to perform privileged tasks. There’s no difference in the access given to someone with a permanent versus an eligible role assignment. The only difference is that some people don’t need that access all the time. – דורש מהמשתמש פעולות מסוימות על מנת להשתמש באותו תפקיד ויכולים להפעיל אותו ברגע שהם צריכים לבצע משימה . |
| active | Type | A role assignment that doesn’t require a user to perform any action to use the role. Users assigned as active have the privileges assigned to the role.- משתמש אשר מוקצה עם תפקיד מראש |
| activate | The process of performing one or more actions to use a role that a user is eligible for. Actions might include performing a multi-factor authentication (MFA) check, providing a business justification, or requesting approval from designated approvers. – הפעלת אותה משימה המצריכה אישור עבור אותו משתמש פעולות שכוללות בין היתר חיבור
MFA . |
|
| assigned | State | A user that has an active role assignment. – הקצאת תפקיד |
| activated | State | A user that has an eligible role assignment, performed the actions to activate the role, and is now active. Once activated, the user can use the role for a preconfigured period-of-time before they need to activate again. - ברגע שאותו תפקיד מופעל ניתן לבצע פעולות אדמין במערכות |
| permanent eligible | Duration | A role assignment where a user is always eligible to activate the role. - תפקיד שאותו משתמש יכול להפעיל |
| permanent active | Duration | A role assignment where a user can always use the role without performing any actions. - תפקיד קבוע למשתמש |
| expire eligible | Duration | A role assignment where a user is eligible to activate the role within a specified start and end date. - תפקיד עם מגבלת זמן לפי תאריך התחלה ותאריך סיום |
| expire active | Duration | A role assignment where a user can use the role without performing any actions within a specified start and end date. - תפקיד שמוקצה למשתמש שיכול לבצע פעולות ללא צורך בתאריך התחלה או תאריך סיום |
| just-in-time (JIT) access | A model in which users receive temporary permissions to perform privileged tasks, which prevents malicious or unauthorized users from gaining access after the permissions have expired. Access is granted only when users need it. - בעיקר נבצע עם תפקיד זה שיוקצה זמנית לטובת משימות ניהוליות | |
| principle of least privilege access | A recommended security practice in which every user is provided with only the minimum privileges needed to accomplish the tasks they are authorized to perform. This practice minimizes the number of Global Administrators and instead uses specific administrator roles for certain scenarios. |
:License requirements
Azure AD Premium P2
Enterprise Mobility + Security (EMS) E5
Microsoft 365 M5
למידע נוסף ראו כאן
First person to use PIM
If you’re the first person to use Privileged Identity Management in your directory, you are automatically assigned the Security Administrator and Privileged Role Administrator roles in the directory. Only privileged role administrators can manage Azure AD role assignments of users. In addition, you may choose to run the security wizard that walks you through the initial discovery and assignment experience.
Enable PIM
To start using Privileged Identity Management in your directory, you must first enable Privileged Identity Management.
- Sign in to the Azure portal as a Global Administrator of your directory.
You must be a Global Administrator with an organizational account (for example, @yourdomain.com), not a Microsoft account (for example, @outlook.com), to enable Privileged Identity Management for a directory.
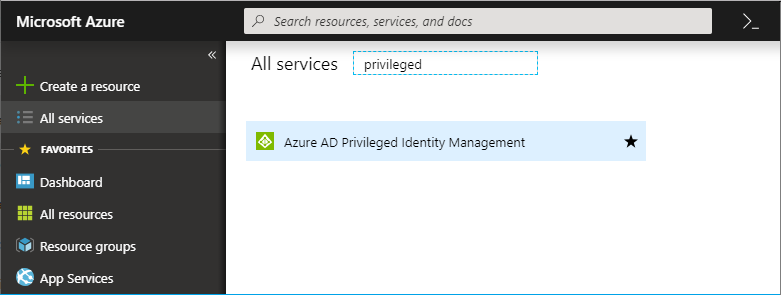
- Click All services and find the Azure AD Privileged Identity Management service.
- Click to open the Privileged Identity Management Quickstart.
- In the list, click Consent to PIM.

- Click Verify my identity to verify your identity with Azure MFA. You’ll be asked to pick an account.

- If more information is required for verification, you’ll be guided through the process. For more information, see Get help with two-step verification.

For example, you might be asked to provide phone verification.

- Once you have completed the verification process, click the Consent button.
- In the message that appears, click Yes to consent to the Privileged Identity Management service.

Sign up PIM for Azure AD roles
Once you have enabled Privileged Identity Management for your directory, you’ll need to sign up Privileged Identity Management to manage Azure AD roles.
- Open Azure AD Privileged Identity Management.
- Click Azure AD roles.

- Click Sign up.
- In the message that appears, click Yes to sign up Privileged Identity Management to manage Azure AD roles.

When sign up completes, the Azure AD options will be enabled. You might need to refresh the portal.
For information about how to discover and select the Azure resources to protect with Privileged Identity Management, see Discover Azure resources to manage in Privileged Identity Management.
Navigate to your tasks
למידע נוסף לחצו כאן
מסמך Best Practice בעבודה עם Azure PIM : https://docs.microsoft.com/en-us/azure/active-directory/users-groups-roles/directory-admin-roles-secure
